Canon EOS 6D
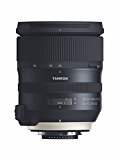
Tamron 24-70mm f/2.8 Lens
Palisade Basin view of Barrett Lakes

@peteracarey
Plan
Overview
Skill level
Difficult
Accessbility
Public Location
Hours
Anytime
Fee
Free
Pack
- Wide-angle lens (24mm)
- Lightweight tripod
- Overnight permit
- Tent or bivy
- Sleeping bag
- Bear canister (recommended!)
- Pad
- Puffy jacket
- Stove
- Food
- Water bottle/bladder
- Filtration
- Bug spray
- Head-net
- Compass
How to get there
N37° 05' 27.9528"W118° 31' 27.7248"
This campsite is one we happened upon by chance while searching for a suitable basecamp to climb in the Palisades. We had been hiking all day, over two passes, and were just ready to set up shop anywhere when we came upon this beautiful sandy shelf among a sea of granite!
Getting to this spot will require at least one overnight stay, so first and foremost, you'll need an overnight permit. These can be reserved in advance for $20 on reservation.gov, or for free in person at a ranger station (Lone Pine or Bishop are the closest two) the day before the trip after 11AM, or the day of the trip after 8AM. There is a quota (15 people per day for walk-ins), so get there early!
In total, the trip is about 8.5 miles one way, with 3,500 feet elevation gain. It isn't easy. Start earlier than you think you should, and give yourself all day. If you want to extend the trip, stay a night along the way and break up the trip.
After picking up your permit, head to Bishop. In Bishop, turn west on Highway 168 (Line St). Stay on Highway 168 for 15 miles, heading up into the mountains. At 15 miles in, turn left onto South Lake Rd. Take South Lake Rd to its end 7.1 miles later. This is the Bishop Pass Trailhead. Head into the upper lot (this is backpacker parking) and park. Pack up and start out on the trail!
The Bishop Pass Trail is well-traveled, and you will undoubtedly see some others on your trip. Over the next 5 miles and 2,300 feet elevation gain, you will pass by many alpine lakes, and see some wonderful mountain views. Once you get to the top of Bishop Pass, the views are even more spectacular!
You will now head toward Thunderbolt Pass. From Bishop Pass to Thunderbolt Pass is all cross-country travel. There is no developed trail, and only spotty use trails can be found. While it is only about 2.5 miles to Thunderbolt Pass, it is not an easy 2.5 miles, and will likely require about the same amount of time as getting to Bishop Pass. I highly advise looking up directions and trip reports for this portion of the hike to supplement the directions below.
From Bishop Pass head southwest and around the northeast side of a small lake. Continue south from that lake toward a small notch. To your left is the massive Mount Agassiz, and to your right is a small granite knob with a series of granite slabs sloping southwest down toward Dusy Basin. Continue straight at the notch and begin navigating your way down slabs and benches. You will be looking at the pointy Isosceles Peak in the distance beyond a lake, with its striking east ridge wrapping around all the way to the Palisades. Below Isosceles is a lake, with a small meadow between you and the lake. Drop down toward the meadow.
You will begin to see Thunderbolt Pass. It is a small, rocky notch where the east ridge of Isosceles wraps around and meets the Palisades on the east. Once at the meadow, head east-southeast across slabs and small patches of meadow, angling toward Thunderbolt Pass. Do not drop all the way down to the lake. The meadow will continue up a grassy drainage for a short while, heading due east. At the top of this grassy drainage, you will begin contouring on granite slabs and benches, eventually coming to a talus field of small-to-large boulders. Make your way over the talus field toward Thunderbolt Pass, which is now very obvious. The boulders will get much larger (car-sized) before reaching Thunderbolt Pass.
Once at Thunderbolt Pass, the jagged west side of the Palisades will be to your left, and the expansive Palisade Basin will be to your right, with Barrett Lakes obvious about 900 feet down into the basin. Pick your way down the granite slabs and benches toward the small streams and ponds you can see about 300-400 feet below the pass. That is your water source for the trip. After filling up, you will head southeast up the granite slabs you can see on the other side of the drainage. There are a few sandy benches in the granite slabs that are fit for a campsite. Find your way to the coordinates, or choose a spot you like!
Tips
Get more with
explorest pro
Learn more about the locations and
how to get the best pictures including:
Best times to go
Current weather conditions and times around twilight
Field tips
Gear used & photo settings
What to do nearby


