Although Singapore is just a little red dot on the map, the island city-state is packed with both greenery and a sprawling cityscape. With just a little exploration, you’d be surprised how many secret scenic photography locations you’ll find.
However, since they are lesser-known spots, therein lies the challenge for you, my enthusiastic traveller! As you walk out of your accommodation, armed with your trusty camera, you’re ready to explore the many hidden gems of Singapore – after all, one can only see so many photos of the Merlion before getting truly bored.
The problem is, you realise that you do not have the faintest clue on where to find the non-mainstream Singapore photography locations you constantly see on social media. But don’t worry, that’s where I come in!
My name’s Jethro and I have lived in the Lion City all my life. For the past few years, I’ve been exploring the many streets and districts of my hometown, armed with my trusty camera. I have found quite a number of amazing locations just hidden in plain sight and I cannot wait to share them with you. Now come along, join me as I bring you on a virtual tour of my ten favorite Singapore photography locations!
Lower Peirce Reservoir
Description
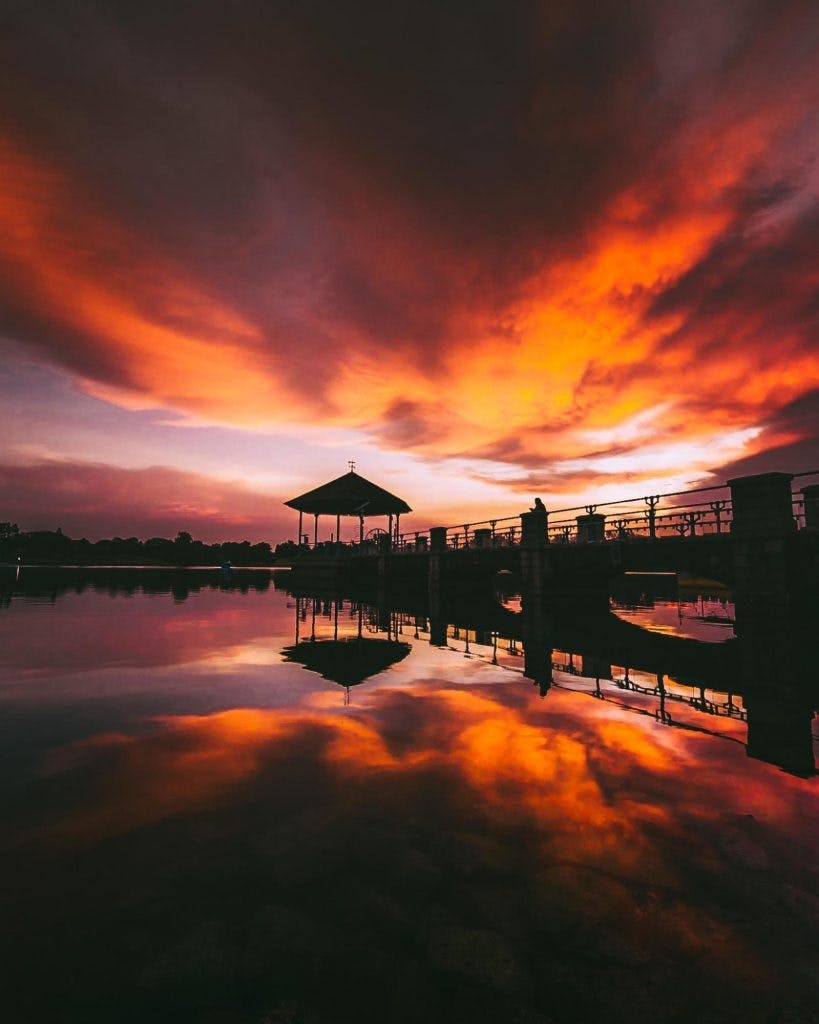
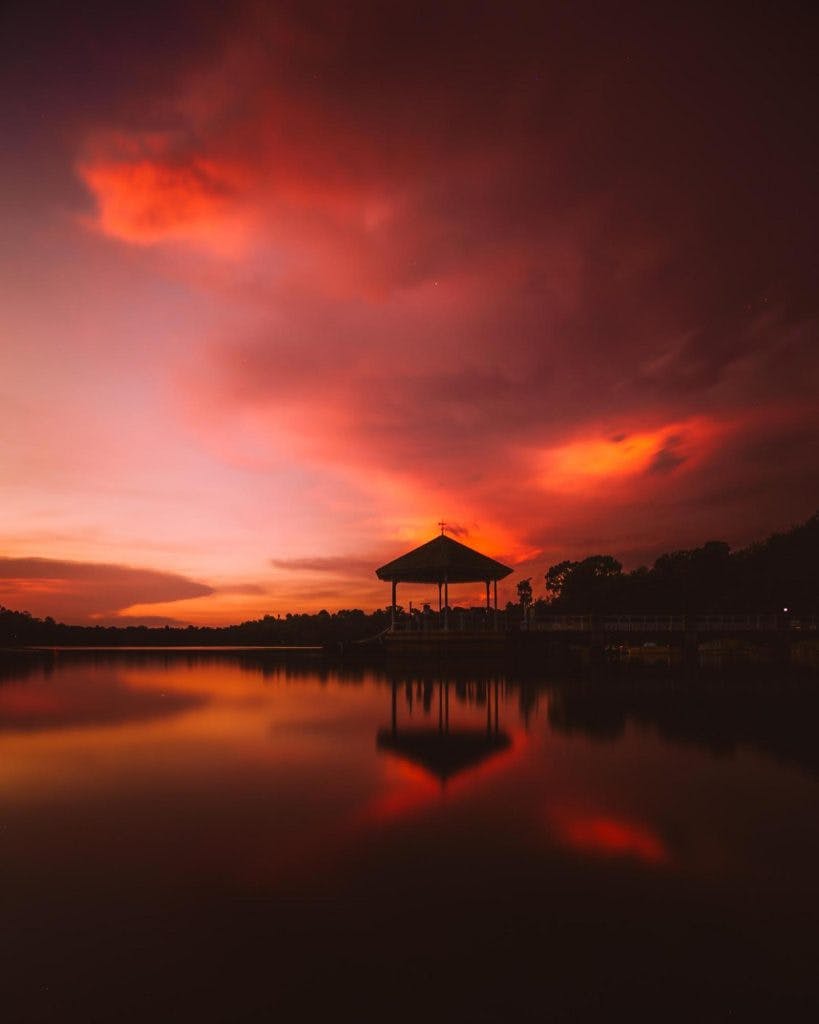
Lower Peirce is the 2nd oldest reservoir in Singapore, commissioned by the government in 1912. Located in the northern parts of Singapore and far away from the bustle of downtown, one can sit by the bank of the reservoir, right next to its calm, tranquil waters, and drink in the view of the sun setting beyond the distant treeline.
How to Get There

You can take buses 163,167, 169, 855, 980. Or if you are coming from the south, stop at Opp Sembawang Hill FC (ID: 56021) and walk. If you are coming down from the north, stop at Bef Ang Mo Kio Ave One (ID: 56019) and walk. Either way, it is about a 10 minute walk to the pavilion.
Tips to Shoot
Arrive about 30 minutes before sunset so you can adequately prepare. I recommend bringing a tripod and a Neutral Density filter to take long exposures of the sun set and water. This allows you to get that amazingly smooth and silky effect of the water, creating some of the cleanest reflections on camera. Of course if you lack the required equipment, simply using a point and shoot camera is perfectly fine.
Upper Seletar Reservoir
Description
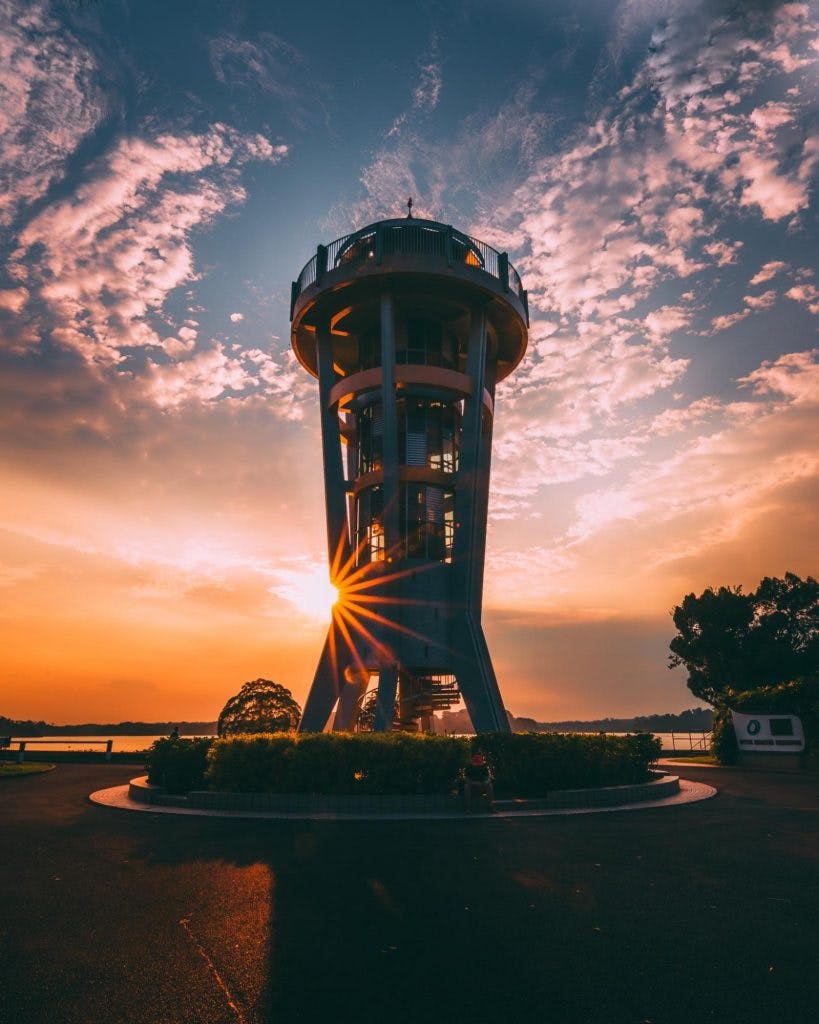
Also located in the north, Upper Seletar is Singapore’s 3rd oldest reservoir, completed in 1940 in response to increasing demand for water. Surprisingly for a man-made body of water, Upper Seletar Reservoir is rather scenic and has the feel of a small lake.
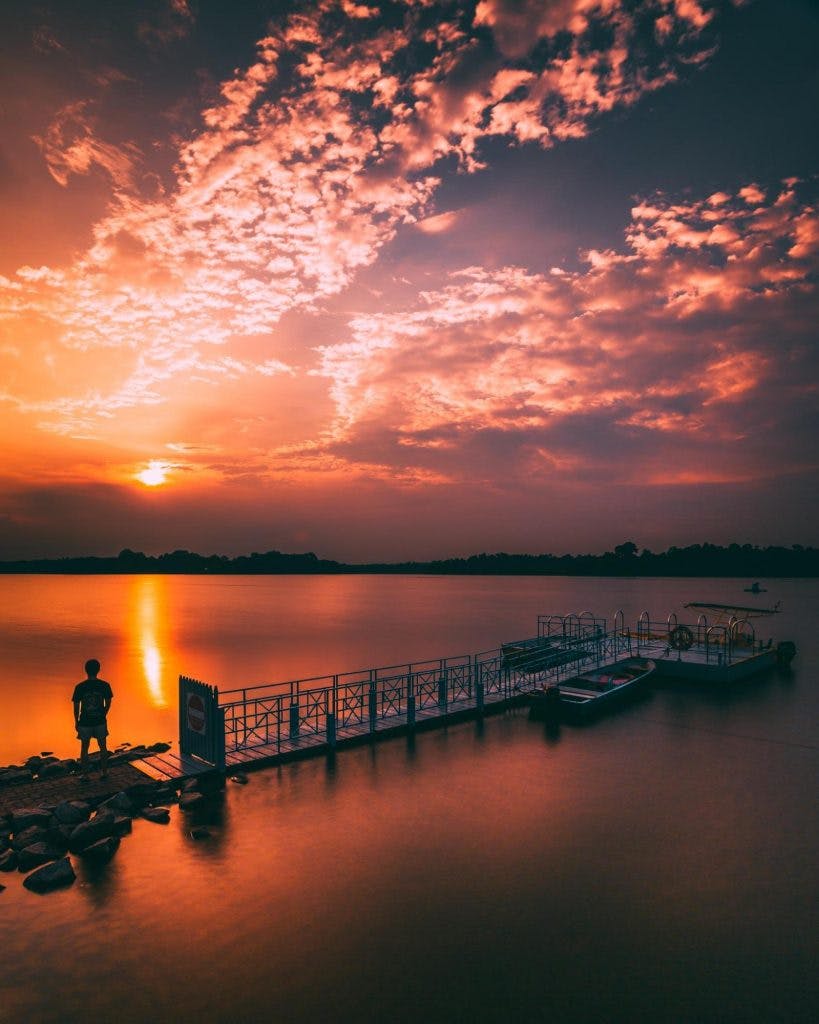
Here, the main points of interest are the lookout tower in the shape of a rocket and the little pier that stretches out into the water. Both make a great backdrop against the sunset.
How to Get There
Take a train to Ang Mo Kio MRT station (North-South line), walk towards the Ang Mo Kio bus interchange and take bus 138, and get off at Opp Upp Seletar Reservoir (ID: 48081). The bus stop is a bit out of the way, so make sure you are using a map app to help you navigate. From the bus stop, it is a 5-10 minute walk to the Seletar Rocket Tower.
Tips to Shoot
As always, come early so that you can be prepared to catch the sunset. I recommend to first photograph the tower with the sun high in the sky. You can then head closer to the water’s edge to take photos of the pier by the water.
Additionally, as there is plenty of wind here, the water is often rippling and moving, unlike the tranquil and still water in Lower Peirce. As such, consider using a tripod and a Neutral Density filter to get some long exposures of the sunset and to achieve that silky water effect.
Paragon Linkbridge
Description
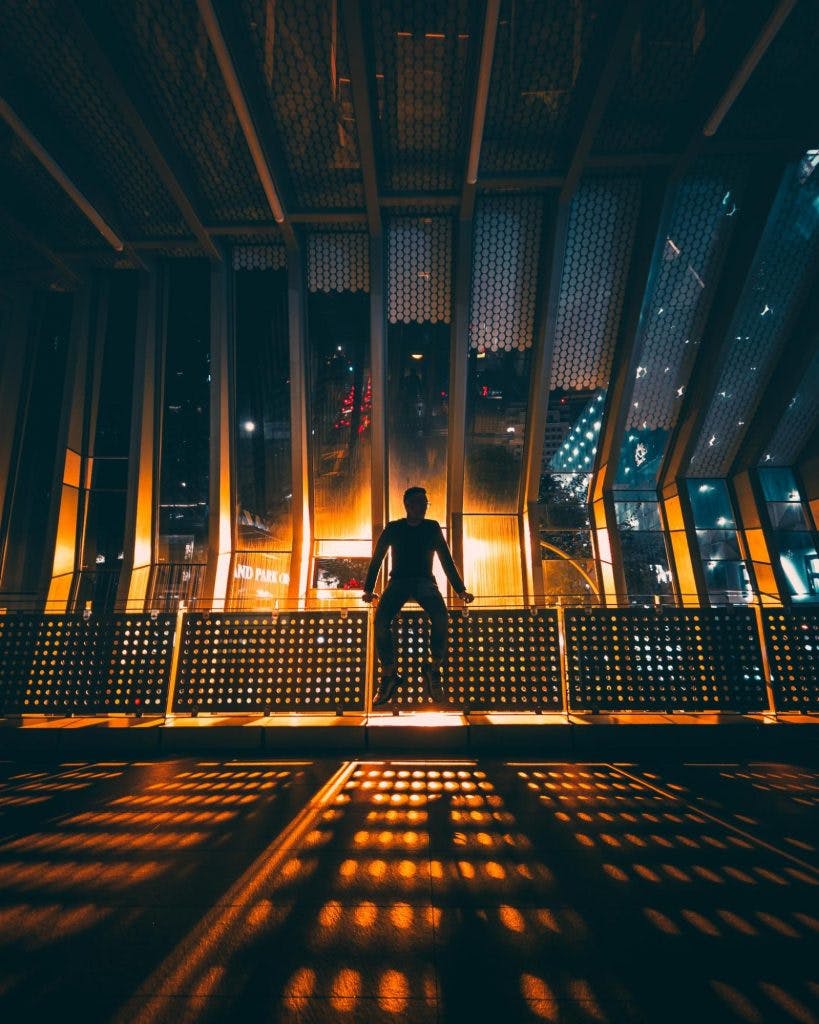
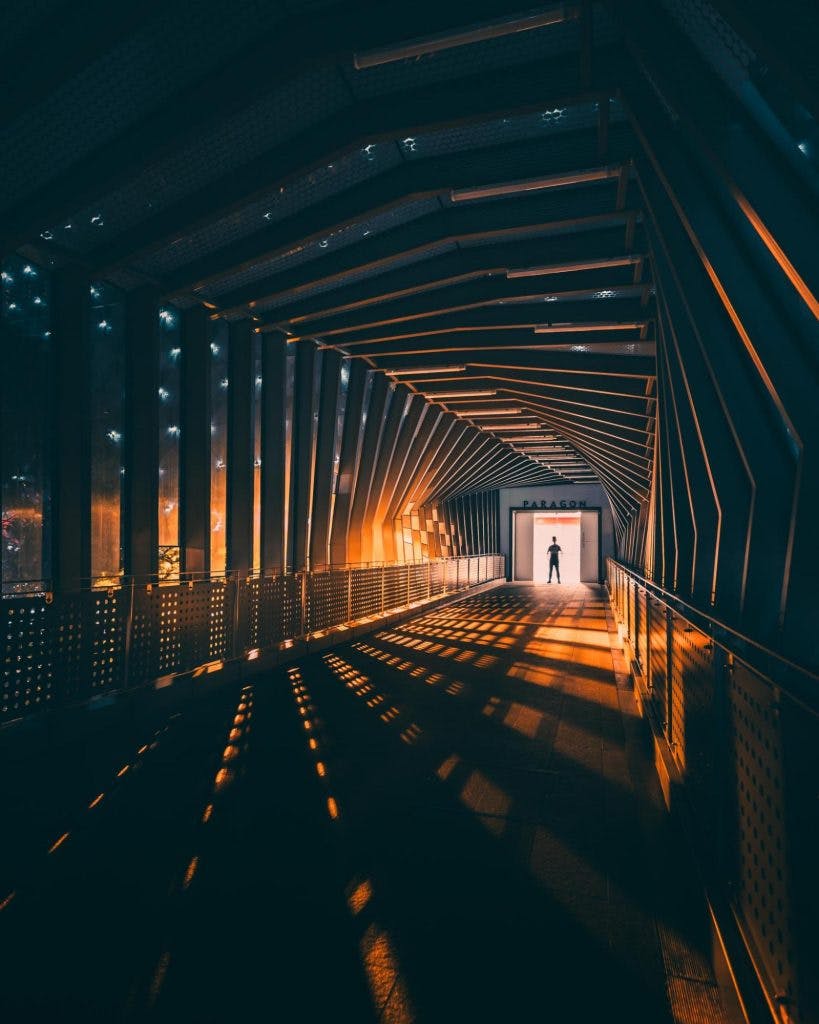
The Paragon is one of the many malls along Orchard Road – Singapore’s famous shopping street. Overlooked by many, this shopping center has a linkway designed in a geometric pattern. Personally, this is my favorite architecture spot in Singapore because late at night when the lights turn off, the bridge transforms into something out of a sci-fi flick! It truly feels like you are traveling on a celestial walkway or through the interior of a huge starship.
How to Get There
Take the MRT to either the Orchard or Somerset MRT stations (North-South Line) and walk to Paragon Shopping Centre. Head up to the 3rd floor and follow the signs to the carpark (the linkway leads to the carpark).
Tips to Shoot
I would say it is best to come on a weekday. The lights turn off around 10 to 10:30pm and a security guard will chase you out by 11pm – so move fast! Of course, you can photograph the bridge during the day or evening, but it is at its most magical when the lights are off. Remember to bring a tripod as the linkway is very dark at night.
Additionally, if you plan to have a human subject in frame who will have to stay still, I recommend capping your shutter speed time at 8 seconds so as to ensure that your subject will be sharp and clear in your shot.
Wheelock Place
Description
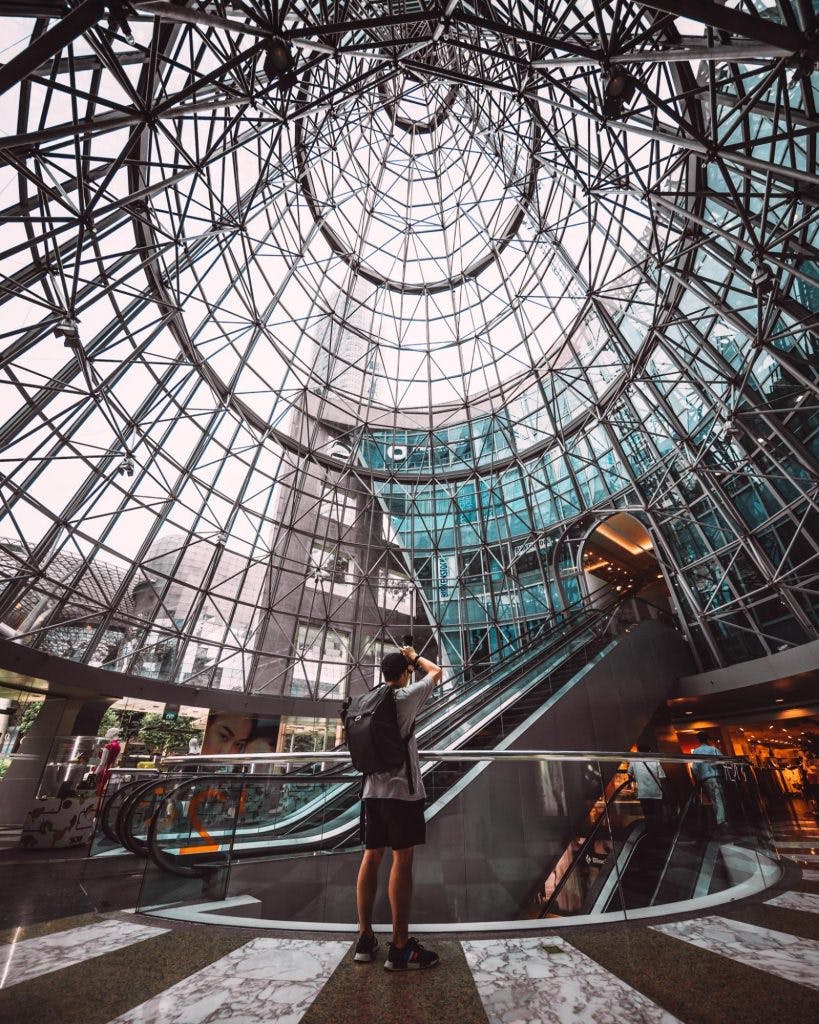
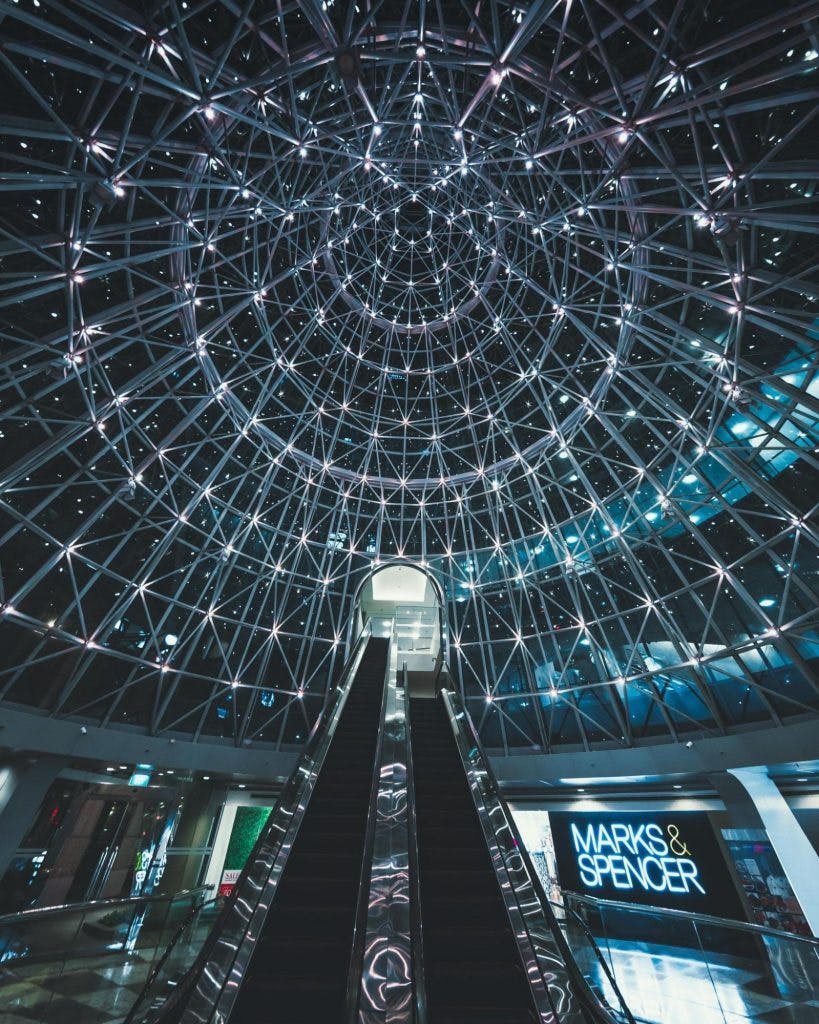
Wheelock Place is yet another one of the many shopping malls on Orchard Road. With its distinct glass conical structure, it really stands out along the road. The moment you enter the mall, it completely wows you with its amazing architecture – a steel and glass lattice rises high up for several stories. At night, as you take the escalator up into the mall, surrounded by the dark sky and a myriad of tiny white lights, it really feels as if you are walking up into a spaceship.
How to Get There
Take the MRT to the Orchard Station (North South Line) and exit via the ION Orchard exit. Follow the signs and walk along the underpass and take the escalator up to the ground floor.
Tips to Shoot
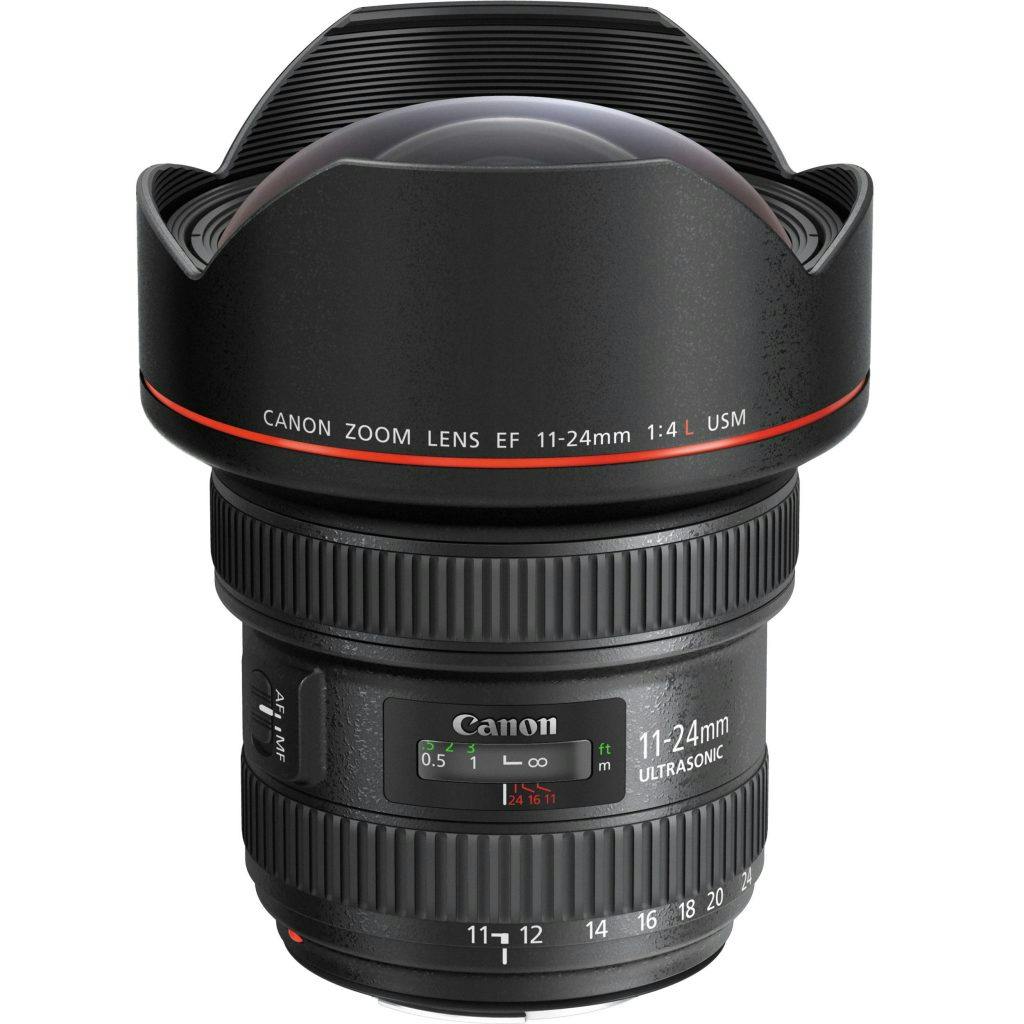
To truly compose the entire ceiling of the entrance in frame, I recommend an ultra-wide angle lens (at least 12mm or wider) or a fish eye lens. Of course, if you have something with a narrower focal length, you still can get your shot or you can be creative and find a new angle!
Bay East view of Marina Bay Sands, Singapore Flyer, and Singapore Skyline
Description
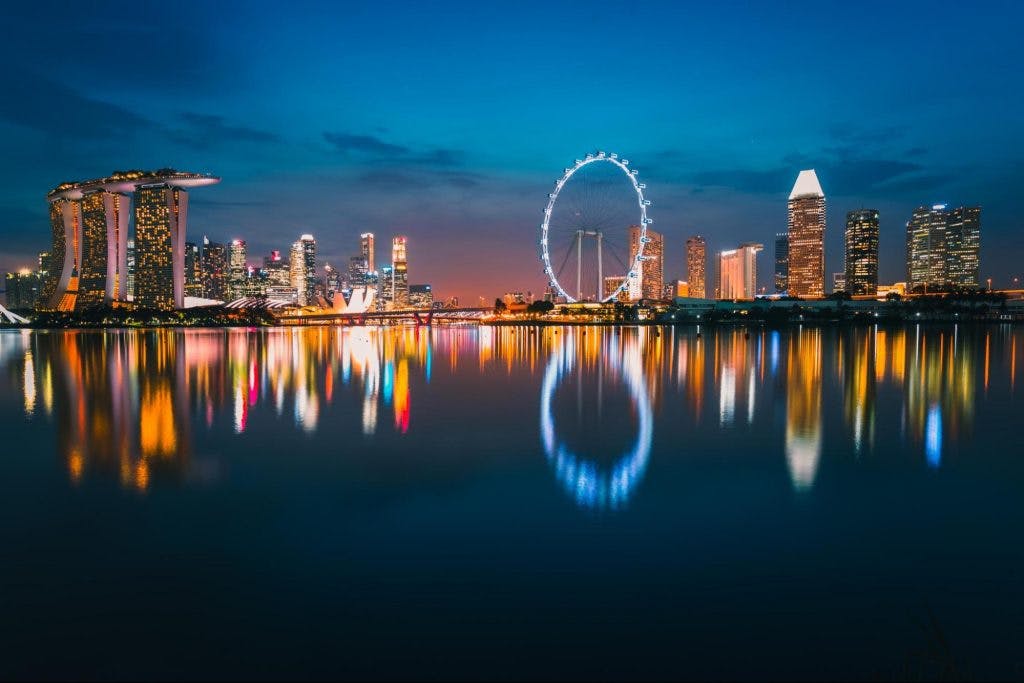
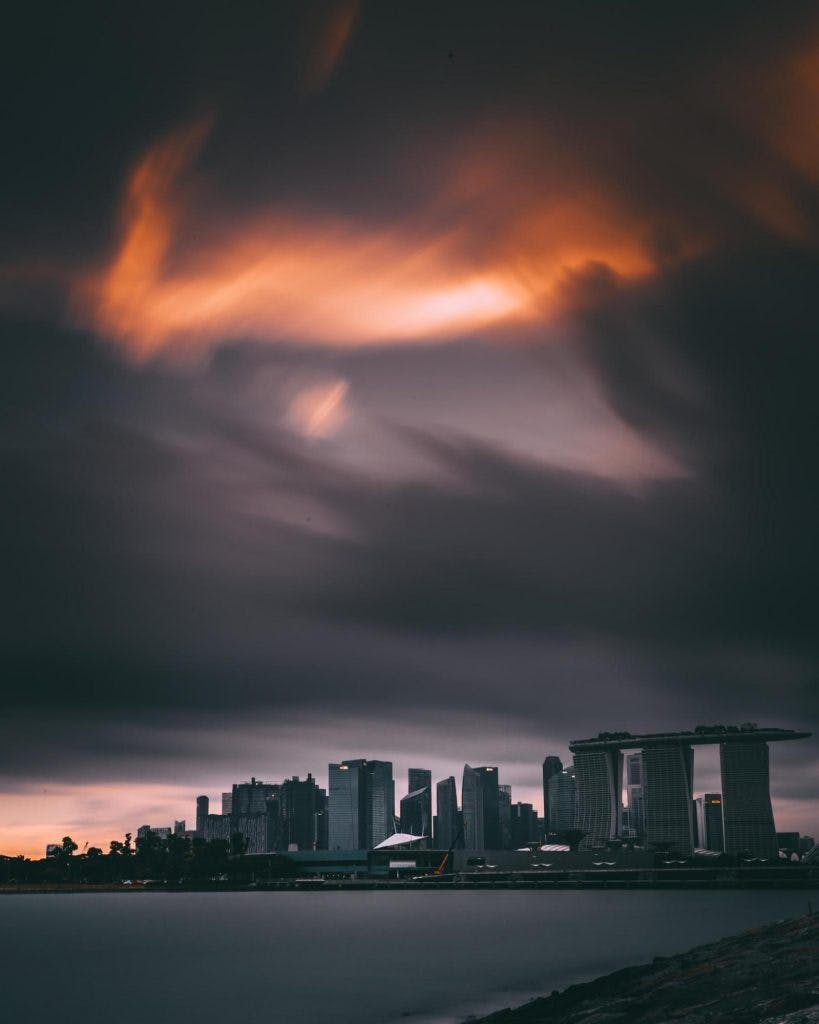
You might have seen a photo like this in one of the many tourist brochures in Singapore, whereby the Singapore skyline is caught in its entirety. However, as you walk around the Bay area, you realise that the buildings are all spread apart and it would be impossible to capture everything in one frame.
It isn’t digitally manipulated though; Bay East is where one can snap the classic reflection shot that incorporates the core of Singapore: the Marina Bay Sands and Singapore Flyer perfectly framing the skyline. I feel this place is a must-visit. As the sun sets in the west, the sky darkens and the city lights up, creating an amazing panorama of light and colour.
How to Get There
This location is along the pathway on Marina East. The easiest way to get there is to be dropped off at Passion Wave @ Marina Bay building (11 Rhu Cross, Singapore 437440). Take a taxi or drive to the building, and from the parking lot either walk under the ECP highway or along the left side of the building towards the water. You’ll see the pathway along the bay, turn left and continue walking up the path about 500 meters. You could also get here by walking through the Gardens by the Bay, crossing the Marina Barrage and walk towards this spot – it is a long, but scenic walk!
Tips to Shoot
Visit at sunset to capture beautiful gradients in the sky and illuminated buildings. Stay for blue hour which nicely blends into the blueish hue of the skyline’s buildings. I recommend using a wide-angle lens to incorporate the key landmarks.
Additionally, as you walk along the bay, the positions of each of the city’s landmarks shift in perspective.
Marina East Breakwater
Description
Located just beyond Marina Barrage, this breakwater offers a unique view of the Singapore skyline. It’s also a great place to relax, just far enough away to avoid the city’s hustle and bustle. Often you will see people here enjoying the breeze or even trying their luck at fishing.
How to Get There
Take the train to Bayfront MRT station (Circle or Downtown line) and walk out of Marina Bay Sands towards the Gardens by the Bay. Make your way towards the Marina Barrage, cross it, turn right, and you’ll see a path of rock curving outwards into the sea.
You’ll see a white sheet of metal walling off the entire area at the entrance, but you can simply walk around it at the opening close to the sea and continue onwards.
Tips to Shoot
If you plan to photograph the sunset, I recommend using a tripod and Neutral Density filter to capture a long exposure. If you can, bring both a wide-angle lens and a narrower focal length lens to photograph both zoomed out and close up shots.
Buddha Tooth and Relic Temple and Museum
Description
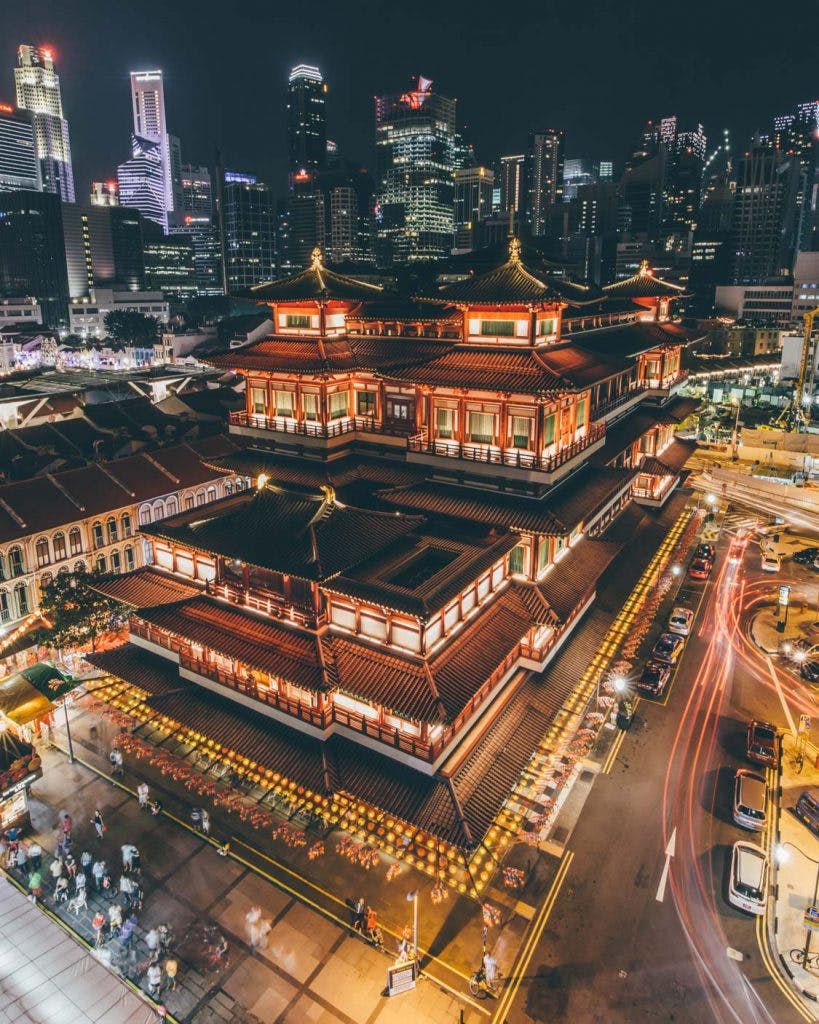
This temple location is one of the largest in Singapore, built in the style of the Tang dynasty. The Chinese architecture of the temple stands in stark contrast to the British colonial shophouses, the monolithic housing apartments, and the glimmering skyscrapers of the Central Business District.
How to Get There
Take a train to Chinatown MRT station (North-East Line or Downtown Line) and walk towards the temple, located along South Bridge Road. It’ll take you about 10 minutes. You can take photograph the temple from ground level across the road. Or, enter the stairwells of the various housing blocks just behind the temple to get a good vantage point.
Tips to Shoot
The temple lights up on certain days when there are religious events and during the Chinese New Year, glowing red in the darkening sky. I recommend using a tripod so you can take long exposures at night. The best times to photograph this location is during the late-afternoon and onwards.
You can also enter the temple to photograph the highly elaborate interior – it is free of charge - but of course, be sure to show respect to the devotees and priests within.
Temple Street (Chinatown)
Description
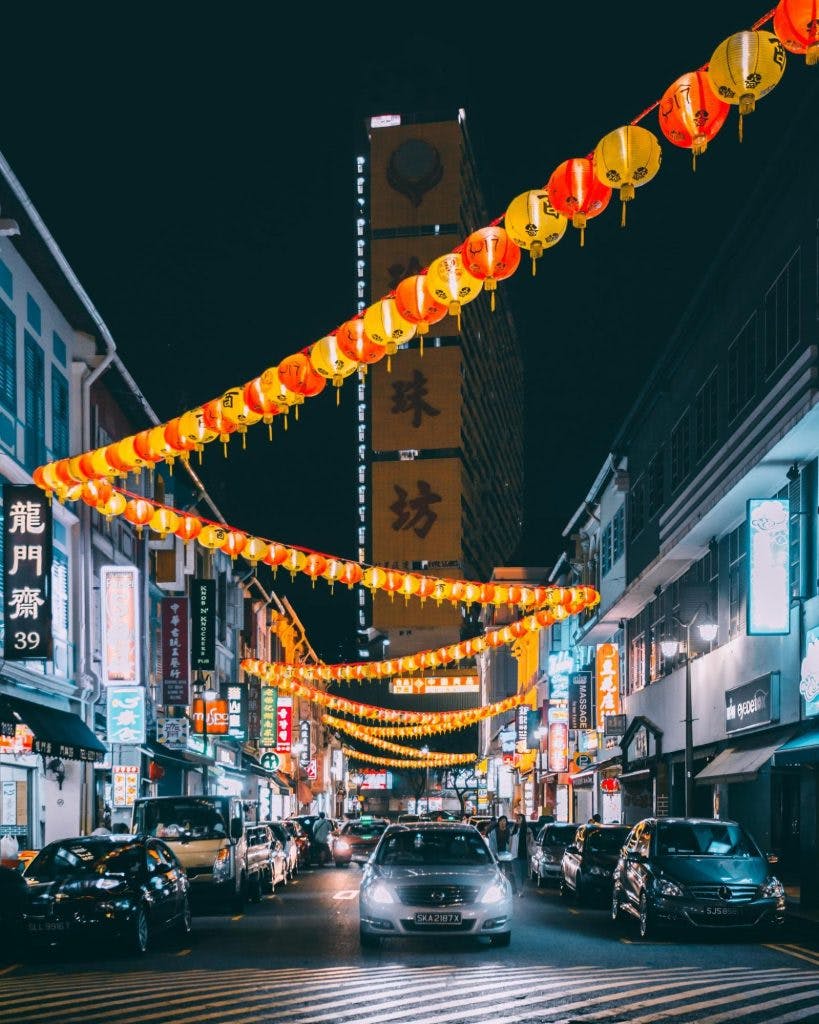
Unlike the famed Temple Street markets in Hong Kong, the markets in Singapore’s Temple Street are only open during the Chinese New Year (CNY) period. Nonetheless, there are numerous storekeepers hawking their wares to a never-ending stream of tourists and locals walking down the narrow lane. When CNY is over, the street reverts back to its usual quietness, aside from the occasional car and passerby. The lanterns light up the entire street at all times of the year however, making this a perfect photography location.
How to Get There
Take the MRT to Chinatown station (North-East Line or Downtown line). Walk towards Temple Street; it takes around 5 minutes.
Tips to Shoot
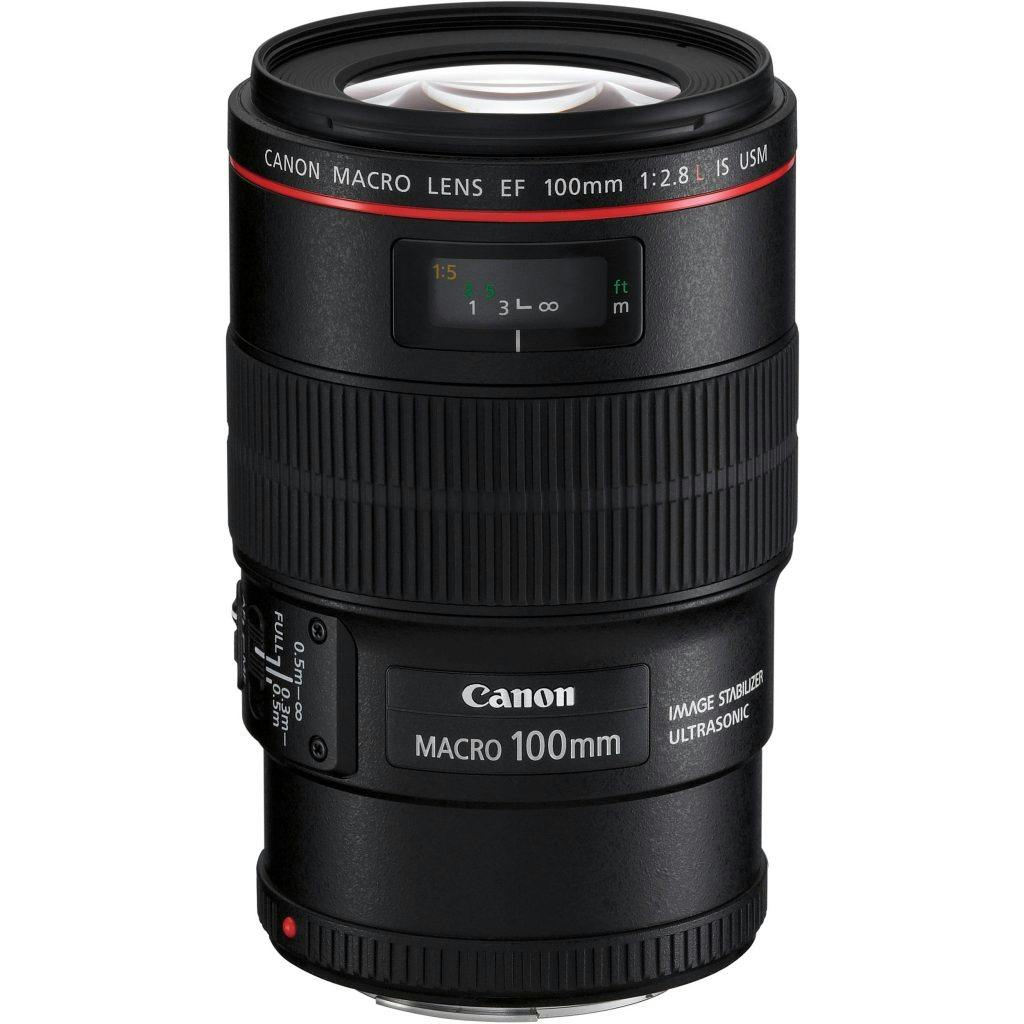
This is a great place for street photography, especially during CNY. I recommend using a 50mm lens or a lens with a narrower focal length to get closeups of the street. You can also use a wide-angle to capture the street in its entirety.
The Sail @ Marina Bay
Description
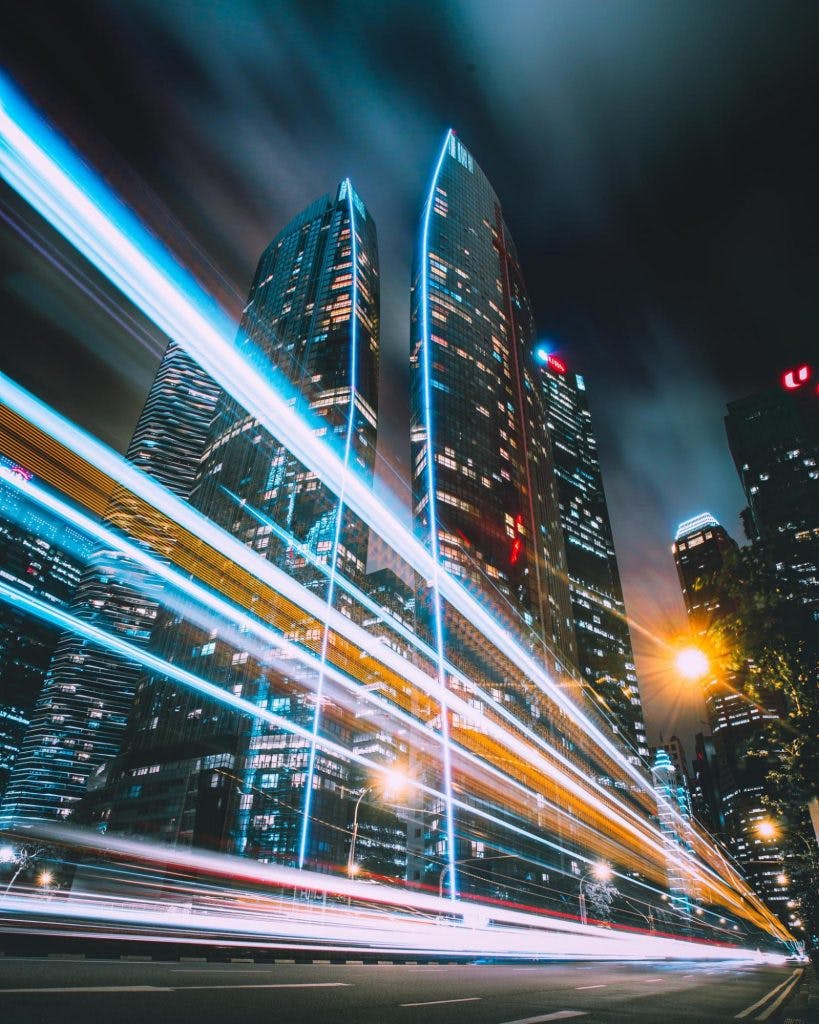
One of Singapore’s tallest condominiums, the glimmering and sleek structure of the sail cuts an imposing and eye-catching figure along the skyscraper-lined roads by Marina Bay. I feel that it is a pity that its architecture is generally underrated because The Sail simply looks amazing in photos, especially at night when it is all lit up.
My favourite composition is to catch the traffic as it roars past you against the futuristic backdrop that The Sail provides. Being this close to the rushing cars, surrounded by buildings shining in the dark, is an amazing experience full of light, sound, and colour.
How to Get There
This photograph was taken on Marina Boulevard (between Marina View and Straits View roads) and is focused on The Sail @ Marina Bay condominium.
Tips to Shoot
To achieve a light trail that would dominate your image’s foreground, you’ll do a long exposure so as to be able to catch a vehicle travelling past your frame. Only a double-decker bus is truly sufficient to get a light trail that fills up your frame.
Next, set your tripod down close to the ground and angle the lens upwards facing the Sail. This really helps to make the light trail look bigger than it should be. A double-decker bus should arrive every 5-15 minutes, depending on the bus schedule and traffic, so, to minimize the time you spend there, be prepared and alert to shoot when it arrives!
Coney Island
Description
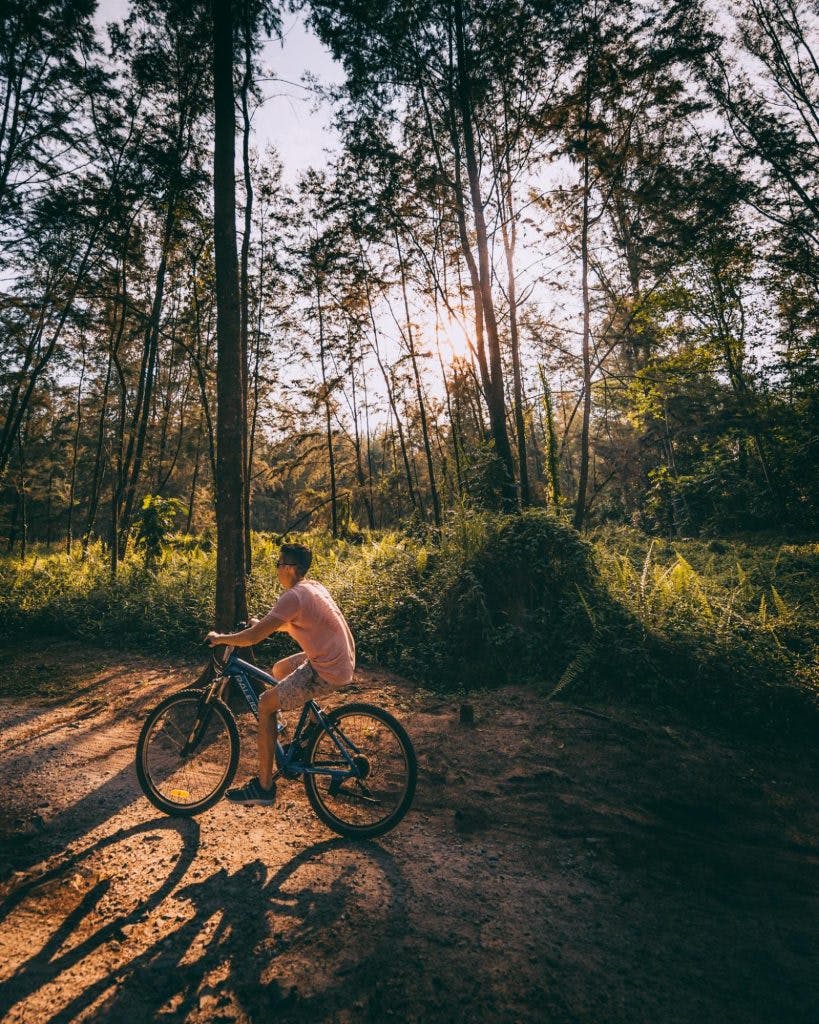
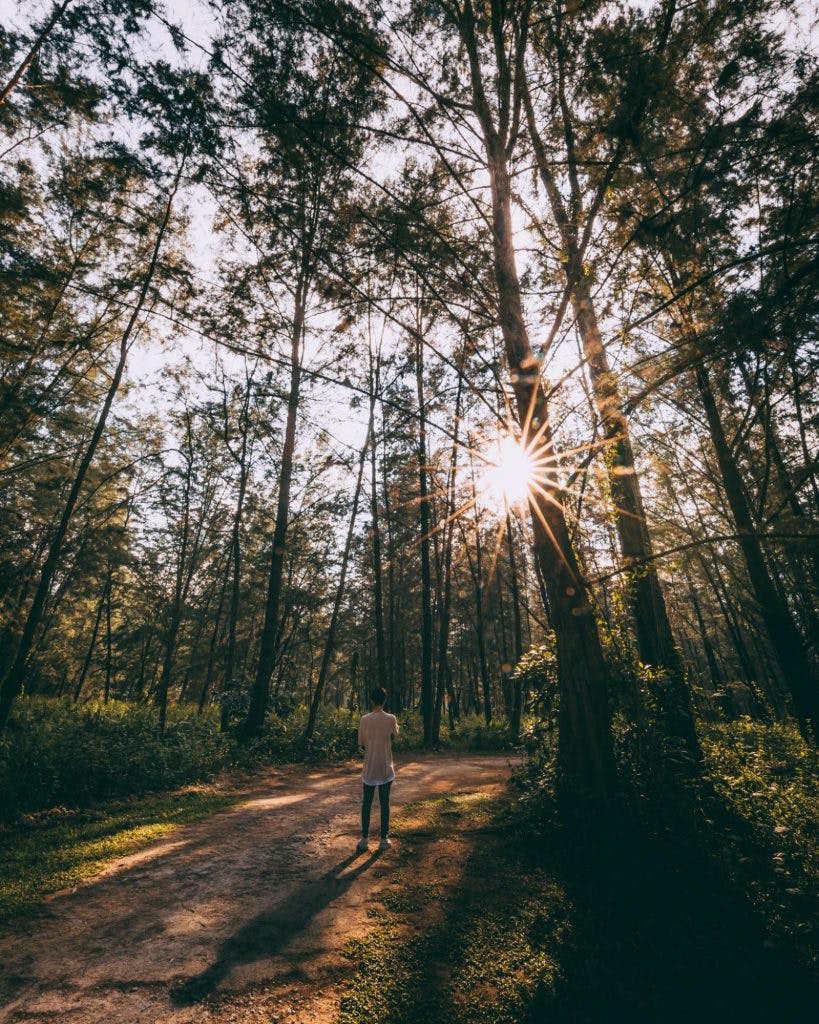
Formerly known as Pulau Serangoon, Coney Island opened to the public in October 2015. The island is home to a variety of habitats, including mangroves along the coast and tall pine trees closer to the center. It’s a great place for an afternoon stroll through its many winding paths. If the light is good, during the late-afternoon when the sun starts to descend, golden light will shine through the forest creating a very picturesque scene not found anywhere elsewhere in Singapore.
How to Get There
Take the MRT to Punggol station (North-East line), then a five minute walk to the Opp Blk 293 bus stop (ID: 65221). Get on bus 84 and disembark at Punggol Rd End bus stop. Walk in an easterly direction along the coast until you see a bridge leading across the sea. This is the West Entrance to Coney Island; head inside and begin exploring!
Tips to Shoot
Bring sunblock and insect repellent should you decide to hike. The best time for photography is during the late-afternoon, between 4 to 6pm. The island’s gates close by 7pm so be sure to leave before then. I recommend bringing both a wide-angle lens and a prime lens to photograph a shot of the towering pine trees. And, do some portraits of your loved ones!
Final Thoughts
Even in the most mundane places, beauty is indeed all around us – one just has to look at Singapore in a different light. These few spots that I shared are just the tip of the iceberg; for a small city, Singapore is filled with many hidden gems. Hopefully my little virtual tour has given you a few more ideas on what to photograph, or even perhaps inspired you to take a short trip to Singapore.
So, get out there and explore! Who knows, you might find an interesting angle even the local photographers were oblivious to. Now that would be something, wouldn’t it?
For more Explorest content, check out our interview with another one of our featured photographers, Jeryl Tan, here!
About the Author
Jethro is a self-taught photographer based in Singapore. He mainly photographs the urban cityscape and scenery around him. But, he does yearn to travel, especially when he gets hold of enough money and time.
You can find him and his work hanging out on Instagram, where he goes by @jethoon.
He is also a contributing Explorest, so you can discover more of his favorite photo locations and tips on the mobile app! Be sure to check it out!